kali中使用nginx
大约 3 分钟
kali中使用nginx
1.查看nginx信息
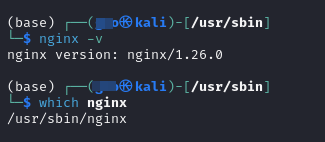
kali中已经安装好了nginx服务,使用如下命令查看nginx版本。
#查看nginx版本 nginx -v
#查看nginx可执行文件所在目录 which nginx
2.查看nginx默认配置文件
kali操作系统中nginx服务默认的配置文件在/etc/nginx/目录下,其中sites-available/default文件中包含nginx服务的关键配置,具体配置文件如下:
##
# You should look at the following URL's in order to grasp a solid understanding
# of Nginx configuration files in order to fully unleash the power of Nginx.
# https://www.nginx.com/resources/wiki/start/
# https://www.nginx.com/resources/wiki/start/topics/tutorials/config_pitfalls/
# https://wiki.debian.org/Nginx/DirectoryStructure
#
# In most cases, administrators will remove this file from sites-enabled/ and
# leave it as reference inside of sites-available where it will continue to be
# updated by the nginx packaging team.
#
# This file will automatically load configuration files provided by other
# applications, such as Drupal or Wordpress. These applications will be made
# available underneath a path with that package name, such as /drupal8.
#
# Please see /usr/share/doc/nginx-doc/examples/ for more detailed examples.
##

# Default server configuration
#
server {
        listen 80 default_server;
        listen [::]:80 default_server;

        # SSL configuration
        #
        # listen 443 ssl default_server;
        # listen [::]:443 ssl default_server;
        #
        # Note: You should disable gzip for SSL traffic.
        # See: https://bugs.debian.org/773332
        #
        # Read up on ssl_ciphers to ensure a secure configuration.
        # See: https://bugs.debian.org/765782
        #
        # Self signed certs generated by the ssl-cert package
        # Don't use them in a production server!
        #
        # include snippets/snakeoil.conf;

        root /var/www/html;

        # Add index.php to the list if you are using PHP
        index index.html index.htm index.nginx-debian.html;

        server_name _;

        location / {
                # First attempt to serve request as file, then
                # as directory, then fall back to displaying a 404.
                try_files $uri $uri/ =404;
        }

        # pass PHP scripts to FastCGI server
        #
        #location ~ \.php$ {
        #       include snippets/fastcgi-php.conf;
        #
        #       # With php-fpm (or other unix sockets):
        #       fastcgi_pass unix:/run/php/php7.4-fpm.sock;
        #       # With php-cgi (or other tcp sockets):
        #       fastcgi_pass 127.0.0.1:9000;
        #}

        # deny access to .htaccess files, if Apache's document root
        # concurs with nginx's one
        #
        #location ~ /\.ht {
        #       deny all;
        #}
}


# Virtual Host configuration for example.com
#
# You can move that to a different file under sites-available/ and symlink that
# to sites-enabled/ to enable it.
#
#server {
#       listen 80;
#       listen [::]:80;
#
#       server_name example.com;
#
#       root /var/www/example.com;
#       index index.html;
#
#       location / {
#               try_files $uri $uri/ =404;
#       }
#}
3.部署web文件
nginx的配置文件中已经配置了根路径:/var/www/html,将web文件放置到该目录下即可。
web文件中需要包含index.html主页文件(即打开网站时访问的第一个页面),且必须放置在/var/www/html目录下。
root /var/www/html;
将/var/www/html目录下的index.html文件重命名为index.html.bak
sudo mv index.html index.html.bak
新建文件index.html并添加以下内容,然后将index.html文件放置到/var/www/html目录下。
<!DOCTYPE html>
<html lang="en">

<head>
    <meta charset="UTF-8">
    <meta name="viewport" content="width=device-width, initial-scale=1.0">
    <title>Document</title>
    <style>
        * {
            margin: 0;
            padding: 0;
        }

        html {
            height: 100%;
        }

        body {
            height: 100%;
        }

        .gradient-bg {
            height: 100%;
            background-image: linear-gradient(to right, #fbc2eb, #a6c1ee);
        }

        .login-box {
            background-color: #fff;
            width: 358px;
            height: 588px;
            border-radius: 15px;
            padding: 0 50px;
            position: relative;
            left: 50%;
            top: 50%;
            transform: translate(-50%, -50%);
        }

        .login-header {
            font-size: 38px;
            font-weight: bold;
            text-align: center;
            line-height: 200px;
        }

        .input-field {
            display: block;
            width: 100%;
            margin-bottom: 20px;
            border: 0;
            padding: 10px;
            border-bottom: 1px solid rgb(128, 125, 125);
            font-size: 15px;
            outline: none;
        }

        .input-field::placeholder {
            text-transform: uppercase;
        }

        .login-button {
            text-align: center;
            padding: 10px;
            width: 100%;
            margin-top: 40px;
            background-image: linear-gradient(to right, #a6c1ee, #fbc2eb);
            color: #fff;
            border-radius: 8px;
        }

        .message {
            text-align: center;
            line-height: 88px;
        }

        a {
            text-decoration-line: none;
            color: #abc1ee;
        }
    </style>
</head>

<body>
    <div class="gradient-bg">
        <div class="login-box">
            <div class="login-header">请你登录</div>
            <div class="form-content">
                <input type="text" name="username" placeholder="账号" class="input-field">
                <input type="password" name="password" placeholder="密码" class="input-field">
                <div class="login-button">登录</div>
            </div>
            <div class="message"> 如果没有账户? <a href="#">请先注册</a> </div>
        </div>
    </div>
</body>

</html>
4.nginx管理命令
#启动nginx服务
service nginx start

#停止nginx服务
service nginx stop

#查看nginx服务是否启动成功
ps -ef | grep nginx

#强制关闭进程
kill -9 pid(进程号)
5.访问web页面
- 启动nginx页面
- 打开服务器输入 http://localhost:80 即可查看web页面
Loading...